
How to bake your own home made bread from scratch
Maybe you already considered it every now and then, but did the stories about baking bread put you off every time. It’s a time consuming task and you need to be quite precise and then your bread is quickly bought at the baker on the corner of the street again. But now that time is not a huge issue anymore and we’re trying to avoid shops a bit, it may be the right time to give it a try. And with our products and all of the tips below, you’ll come well-prepared.

You might have looked into a few recipes for bread once. Then you were probably confronted with different kinds of flours. Did this make it quite challenging for you already? That’s not that strange, as they often get switched easily. But for different types of bread, you do need different types of flour. So it is in fact quite important to understand what you need.
With all these kinds of flours we are dealing with of course, ground grain. For whole flour the entire grain is being used, so including all the skins, brans and germs. And then there are the type of flours that are being sieved. During the sieving process all those skins and shells stay in the sieve. Therefore, these have a finer structure and a whiter colour, but also less fibers. Cause the fibers are mainly in all of those coarser parts of the grain.
And then of course we’ve got many different types of grain to make flour from, such as wheat, rye or spelt. These all give different flours with their own characteristics, giving the bread different flavours, colours and textures. The flours from FunCakes are made from wheat. We offer wheat flour and whole wheat flour, so one made of a sieved wheat grain and one made from the entire wheat grain. And are you choosing sweet treats over bread? Then we’ve got another type of flour: FunCakes Pastry Flour.

Many countries in Europe have different ways of explaining the characteristics of the flour. In Germany and France flour type numbers are being used which indicate the ash content of the flour, while in the UK the protein content of the flour is often specified. Therefore, please check the table below to review the characteristics of the FunCakes flours.
Netherlands | Germany | France | Italy | Spain | Protein | |
| FunCakes Wheat Flour | 260 | Type 550 | Type 65 | Tipo 0 | Type 70 | 12,5% |
| FunCakes Whole Wheat Flour | 280-320 (volkoren tarwemeel) | Vollkorntype 1600 | Farine Intègral Type 150 | Farina integrale di grano tenero | Harina integrale 150 | 14,5% |
Maybe you now start to get a feeling about the different types of flour to use, but which flour is used for which kind of bread?
| Type of bread | Type of flour |
| White wheat bread | Wheat flour |
| Brown wheat bread | A mix of wheat flour and whole wheat flour (50/50) |
| Whole wheat bread | 100% whole wheat flour |
So indeed, you need to be quite precise when baking bread, but that doesn’t automatically mean it’s very complicated. You just need to make sure you choose the right main ingredient for the type of bread you’d like to bake. Switching to a different type of flour just because that’s the one they have on stock in your local supermarket, may not be the best idea. And the same applies for the quantities: stick to the recipe. Baking isn’t cooking. A bit more of one ingredient and a bit less of the other doesn’t still make a nice meal.
Kneading the dough
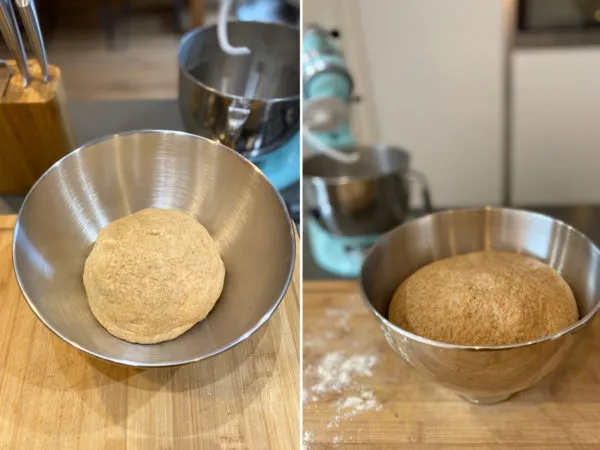
Do you tend to be a bit lazy sometimes? Try not to let that happen when baking bread, cause the bread will make you pay for it. Kneading the dough might be the most important part of the baking process, cause without you noticing there’s a lot more happening when kneading the dough than just mixing all the ingredients. Kneading is essential to activate the gluten in the wheat. These gluten are what give the bread its airiness. And to develop the gluten, the dough should be kneaded long, but not too long. Keep 10-15 minutes of kneading into account. Do you have the luxury of a standing mixer at home, then use the dough hook and put it on medium speed. To check if the dough is kneaded sufficiently, do the windowpane test. Take off a small piece of the dough, hold it with both hands and then slowly move your hands away from on another to stretch the dough apart into a windowpane. Think of it like bubblegum! If you can stretch the dough into a wafer thin sheet without it breaking, the gluten have been well-developed and it’s ready to rise. If it breaks easily, you will have to knead it a bit more.
Giving the dough time to rise is important for the flavour and airiness of the bread. This process is inseparable from the kneading, cause a dough that isn’t kneaded well, will never rise. This is also the part of the bread making where your patience is required. Cause before the bread is ready to be baked, it’s important to let it rise twice. The first time for 30-45 minutes and a second time for 90 minutes. To make the dough rise well, two things are important: a warm spot and enough humidity. The yeast you’ve added to the dough will make it rise. Because yeast loves a bit of warmth (don’t we all?), it’s important to give the bowl with dough a warm spot. Don’t exaggerate, just above room temperature is enough. You can also use the oven, by putting it on 30°C and placing a bowl of water into the oven together with your dough. The water will keep the air humid enough so the dough doesn’t dry out. If you place the bowl somewhere else on a warm spot, then put some cling film or a wet dishcloth over your bowl to prevent the dough from drying out.
When the dough rises well, you will be rewarded big time for your patience! After a little hour you should find a ball of dough that’s twice as big! If this isn’t the case, then give it some extra time or find a warmer spot for it.
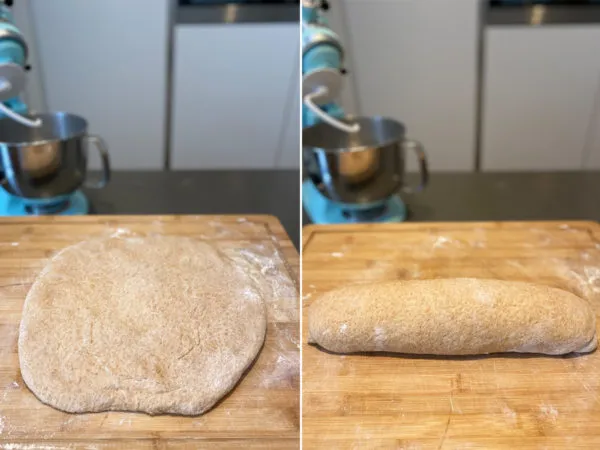
After this first rise you will flatten the dough with your fingers to squeeze the air out. Then it’s time to give the dough it’s final shape you like your bread to get and you will put it aside on a warm spot again for another 90 minutes. This final stage before baking is called proving the dough. Follow the same guidelines for this proving part as you did for the first rise.
Finally, we’ve reached the baking part. Not that long anymore before that delicious smell of freshly baked bread will fill your home. If you’d think this part is just a matter of putting the dough in the oven… Sorry, think again. You can still take some steps to improve the bread quality even more. Starting with of course, preheating your oven! Make sure your oven is already on the right temperature when the dough goes in. But that’s not all. To get a nice, crispy crust, a high humidity during the first phase of baking helps. To accomplish this you can spray the edges of your oven on the inside with water by using a plant spray. Or bake your bread in a Dutch oven, which you place in the preheated oven. Bake the bread for 30 minutes with the lit on the pan, then removing the lit and bake for another 15 minutes.
Check if your bread is baked well by knocking on its bottom. When the sound is hollow, the moment is there! Your own home made bread is ready.
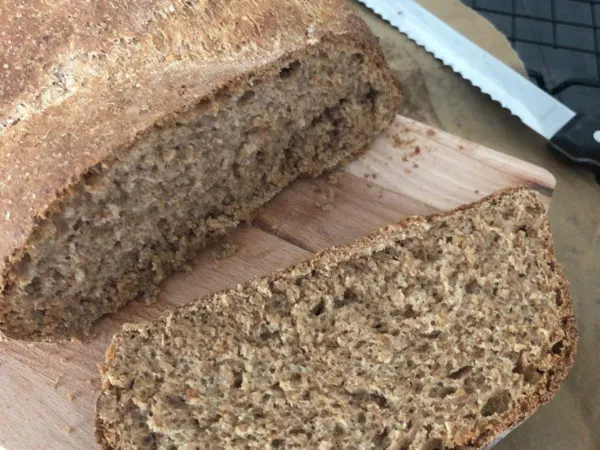
The house smells irresistible, your bread has coloured nicely and sounds perfectly hollow. Unfortunately you still need some very last patience to really start enjoying it. Cause in order to cut the bread right, it needs to cool down. Slicing baked bread right away will ruin all your hard work. So hang in there just a little longer!
Of course you want to enjoy your bread for as long as possible. So make sure to store it in a closed bag, lunch box or clean dishcloth. Did you do your best to create a nice crunchy crust? Then make sure to use a paper bag. A plastic bag works fine too, but will make the crust softer. Do you still feel your own bread doesn’t stay fresh as long as your bakery’s bread does? You might be right. Professional bakers use bread improvers in their breads. These increase the bread quality by making the dough easier to process and giving the bread more airiness. And it keeps the bread fresh longer! So follow your bakery’s example and add one of our bread improvers for white bread, brown bread or bread rolls. Check them here.
Now you know all of this, you are ready to start baking your first bread! Check out all of our bread recipes now and choose your favourite. What will it be? A robust bread to go with a glass of wine, bread rolls for Sunday’s breakfast or a home made sandwich for lunch this week?
Still don’t feel entirely ready to go for it? Watch the video below in which we show you all the step one by one. And visit our Youtube channel for more interesting how to baking videos! Also about baking bread rolls. Perfect for next weekend!