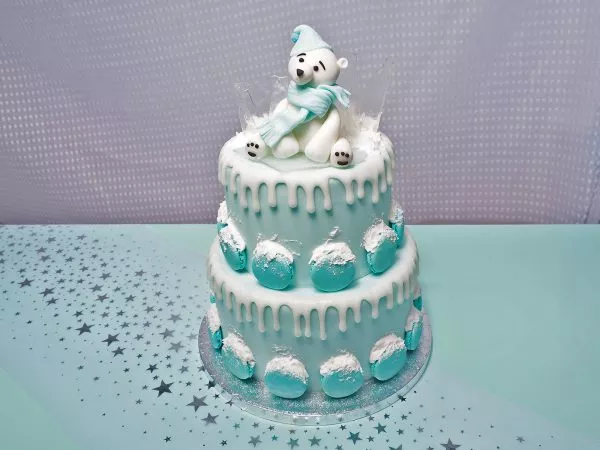
Winter cake with polar bear
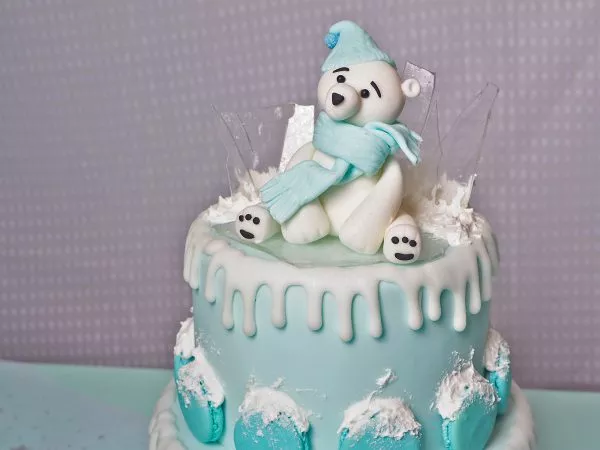
Because of the cute polar bear on top, this ice blue winter cake still gives us a warm feeling.
Ce dont vous avez besoin pour faire votre winter cake with polar bear:
Ingrédients
- 550 g FunCakes Mix for Sponge Cake
- 300 g FunCakes Mix for Buttercream
- 300 g FunCakes Mix for Macarons
- 250 g FunCakes Mix for Royal Icing
- 250 g FunCakes Modelling Paste White
- 850 g FunCakes Fondant - Bright White
- Small piece FunCakes Fondant - Raven Black
- FunCakes Flavour Paste -Witte Choco-
- FunCakes Edible FunColours Gel – Baby Blue
- 200 g FunCakes Dip ‘n Drip White
- FunCakes Mimosa -Blue-
- FunCakes Sugar Pearls 4mm -Shiny black-
- FunCakes Edible Glue
- 350 ml water
- 9 eggs (approx. 450 g)
- 375 g unsalted butter
- 70 g egg white
Nécessités
- FunCakes Bake Release Spray
- FunCakes Magic Roll-Out Powder
- FunCakes Disposable Decorating Bags
- FunCakes Cake Drum Round Ø25cm
- FunCakes Cake Cards silver/gold ROUND 16cm
- Wilton -Wide Glide- Rolling Pin 50cm
- Wilton Ultimate Cake Leveler
- Wilton Decorator Preferred Spatula Angled
- Wilton Decorating Tip #012 Round Carded
- Wilton Chrome-Plated Cooling Grid
- Wilton Bamboo Dowel Rods
- Wilton Icing Smoother
- Wilton Fondant Smoother
- PME Extra Deep Round Cake Pan Ø 20 x 10cm
- PME Extra Deep Round Cake Pan Ø 15 x 10cm
- PME Modelling tool Bone
- PME Modelling tools, Bulbulous cone
- Silikomart Wonder Cakes Macaron MatFMM Knife/scriber tool
- SK Ready Tempered Isomalt Colourless
- Glass bowl
- Small brush
- Tooth picks
Knead 250 grams of white modelling paste smooth for the polar bear. Make a ball for the body and roll this to a cone. Place this cone on a cake carton and stick a tooth pick in it. Cut a bit of, but make sure you still have something left to add the head. For the head you make a ball and flatten it a bit. Make the snout of a small ball and use a knife to add the mouth. Make little holes in the snout with a toothpick. Press two black pearls in the head to make the eyes. Use some black fondant to make the eyebrows and the nose and glue it on the head. Make the ears of small balls and flatten them a bit using the bone tool. Glue them onto the head.
Take four equal pieces of modelling paste and roll this into long cones. Add the toes using a knife. Glue the front legs against the body. On the back legs you make the soles of black fondant which you then glue onto the back of the bear. Knead a bit of modelling paste and colour it blue. Roll it out really thinly and use it to make the scarf. You can also use a pattern roller to give the scarf texture.
For the hat you take a blue ball that you fold around the bulbulous cone. Move the tool to create the right size for the hat. Glue the blue mimosa on the hat and then glue the hat onto the head. Add the scarf to the body and then add the head to the body. Tip, you could use some edible glue.
Prepare 300 grams of FunCakes Mix for Macarons as described on the package and color the batter blue. Put the tip #12 in a decorating bag and fill with the batter. Place the macaron mat on a baking tray and fill the circles on the mat. Tap the baking tray with the macaron mat on the table a few times and let the macarons dry by air for 2 hours. Preheat the oven to 150°C (convection oven 130°C) and bake the macarons for 15 minutes. Let them cool down on the baking mat before removing them.
Preheat the oven to 180°C (convection oven 160°C).
Prepare 550 grams of FunCakes Mix for Sponge Cake as indicated on the package. Grease the baking pans with Bake Release Spray and divide the sponge cake batter into the two pans. Bake the sponge cakes for 30-35 minutes and release them on a cooling grid right after baking.
Prepare 300 grams of FunCakes Mix for Buttercream as described on the package and flavour the buttercream to taste with the flavour paste.
Cut one cake carton a bit smaller than the 15 cm cake and place the cake on top of it. Place the 20 cm cake on top of the cake drum. Potentially use some buttercream in between the cakes and the boards to prevent them from moving.
Cut the cake twice using the cake leveller. Fill the layers with buttercream and stack them on each other. Lubricate the outside of the cake with a thin layer of buttercream to fill holes and get rid of any bumps. Put it in the fridge for 30 minutes and apply another layer of buttercream. Use the scraper to smooth the buttercream layer and put it back in the fridge.
Knead the fondant light blue, roll it out on a with Magic Roll-Out Powder covered working surface and use it to cover the cakes. Use a smoother to make them nice and smooth. Stack the cakes on each other using dowels. Add some buttercream between the cakes, this prevents moving.
Fill a microwave safe bowl with the isomalt and melt this in the microwave. Keep stirring in between. When everything is melted stir the bubbles away, then your isomalt is ready to use. Pour this on a slide of parchment paper and make it smooth with a spatula. Please note: this is very hot! Let this dry and then break it into large pieces.
Heat 200 grams of Dip ‘n Drip for 10 seconds in the microwave and pour it in a decorating bag. Don’t let the drip get too hot. Let the drip slide down along the edges of the cake.
Paste the macarons with some buttercream against the cake. Use a brush with royal icing to add a snowy effect. Put the rest of the royal icing in a decorating bag and pipe some swirls on the top of the cake. Again make a snowy effect using a brush. Put the isomelt in the swirls and place the polar bear on top.
